UPDATE: I did a video tutorial for this tufted backdrop that may show the steps a little better.
Hey party peeps!
The other day, I showed you how to create a simple, cheap and fun photo backdrop for a party. Today, I’m going to show you how I added some bling to my sister’s bridal shower without spending a lot of cha-ching.
First, let me back up. My whole inspiration for Meg’s shower came from one of her business trips. She visited a champagne bar (I think in Chicago) and came back raving about it. She loved the ambiance, the decor, the relaxed atmosphere and the glam. I knew, then, that her shower should be a champagne-themed shower.
I tried looking for pictures of champagne bars and there weren’t a ton to choose from. One thing I kept seeing over and over again was tufted seating and decor. I knew I wanted to bring that element into the shower. My first thought was to go full force and try the real deal tufting. Once I started totaling up the wood and all the materials, I knew it’d be an expensive task (or at least expensive in my book).
So, here’s a cheap way to create tufted party backdrop for your glam shindig.
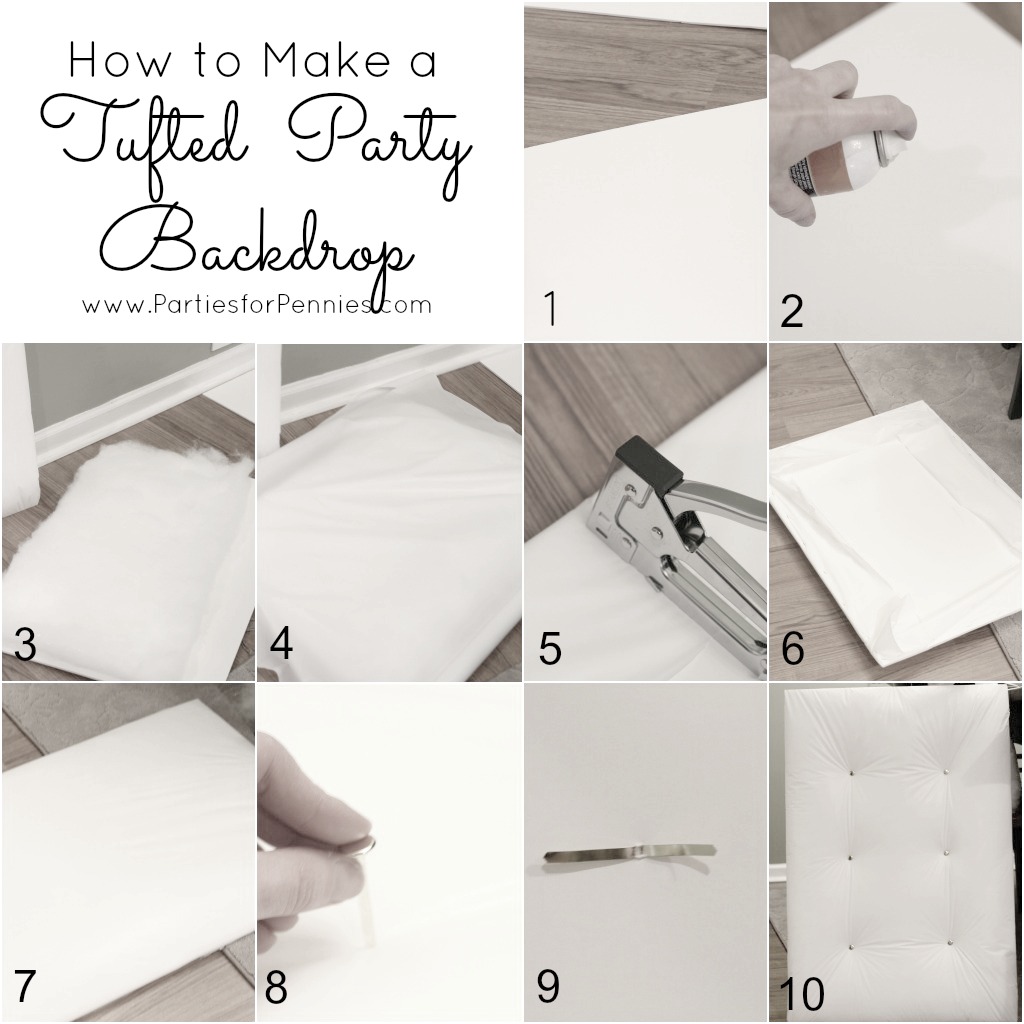
(1) First, gather your supplies.
Here’s what you’ll need:
Foamboard
Spray adhesive
White plastic tablecloth
Batting (or…in my case, I used “snow” that was on clearance for $1/bag)
Gold brads (I got these from my local office supply store)
Diamonds/buttons/any other embellishment to hide the brads
(2) Spray foamboard with spray adhesive
(3) Immediately lay the batting on top of the foamboard, after you sprayed with adhesive.
(4) Cover the batting with the white plastic tablecloth
(5) Wrap the plastic so that it’s snug and staple the edges around the back of the foamboard. I started off securing the longer sides first and then the shorter sides. When you get to the corners, fold over the edges and staple.
(6) This picture shows what the back should look like after you stapled around the edges. You may need to trim the excess.
(7) This picture shows what the front should look like.
(8) Measure equal distances down and across the foamboard to total 6 brad placements. Firmly insert the brad at the location you chose.
(9) Once the brad pushes through to the backside, anchor it by pulling the two “legs” apart and flush against the foamboard.
(10) This is what your finished project should look like.
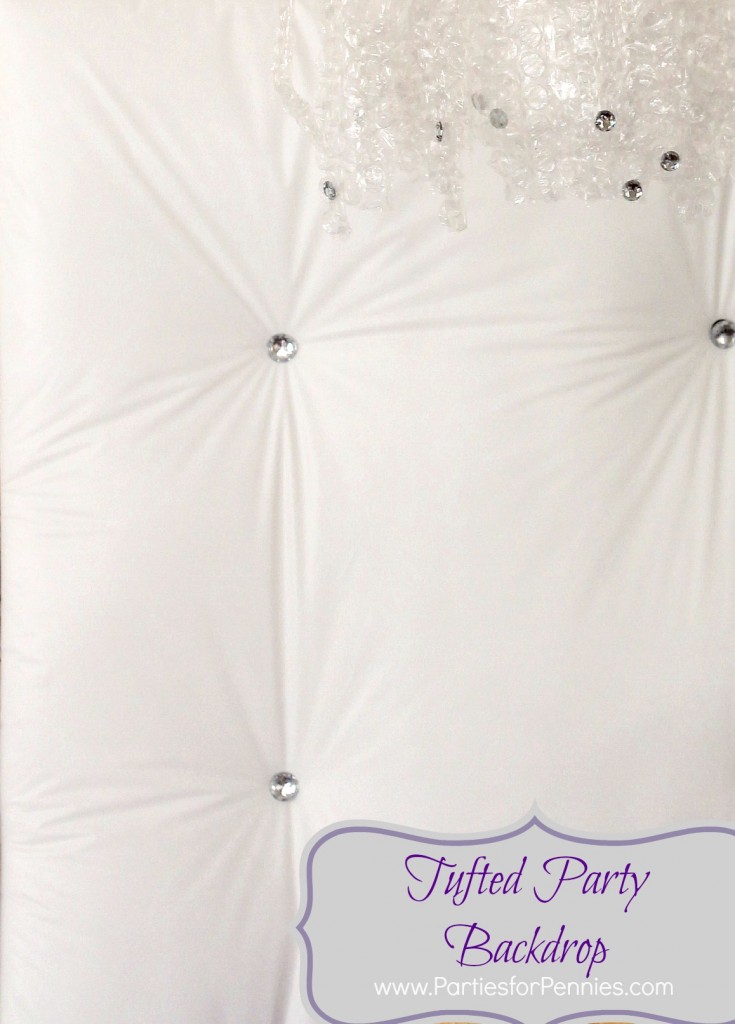
Like I said..I wanted to add some glam to Meg’s shower, so I found a pack full of “diamonds” that I glued on top of the gold brads.
Here’s what it looked like after I glammed it up a bit. As for the total dollar, dollar bill ya’ll…
– Foamboard (got on sale 2 for $3 at Michaels) = $4.50 (used 3)
– Plastic Tablecloth (already had a roll left from a previouse party) = $0
– Batting (lucked out with an after Christmas sale…they had bags of “snow”/batting for $1/each) = $2 (I only used a little over 1 bag)
– Gold Brads (from office supply store) = $2
– Diamond Accents = $2
TOTAL: $10.50 for a glamified backdrop
I normally would try and do it for a few bucks but this was one of the “wow” factors of the shower and I think it wowed.
Don’t worry, my next post will include the whole shower sha-bang!
Until then…party on!

p.s. This is YOUR official invite to the party… on the PartiesforPennies facebook page! Click here.


