Hey party people!
**I’VE COMPLETED AN UPDATED VIDEO TUTORIAL on creating a DIY PHOTO BACKDROP FRAME!! CLICK HERE TO SEE! **

For the Builder’s Floor Covering & Mohawk Flooring grand opening event last weekend, I had to diy two photo backdrop frames.
This is a project that’s super easy, inexpensive and is easy to store.
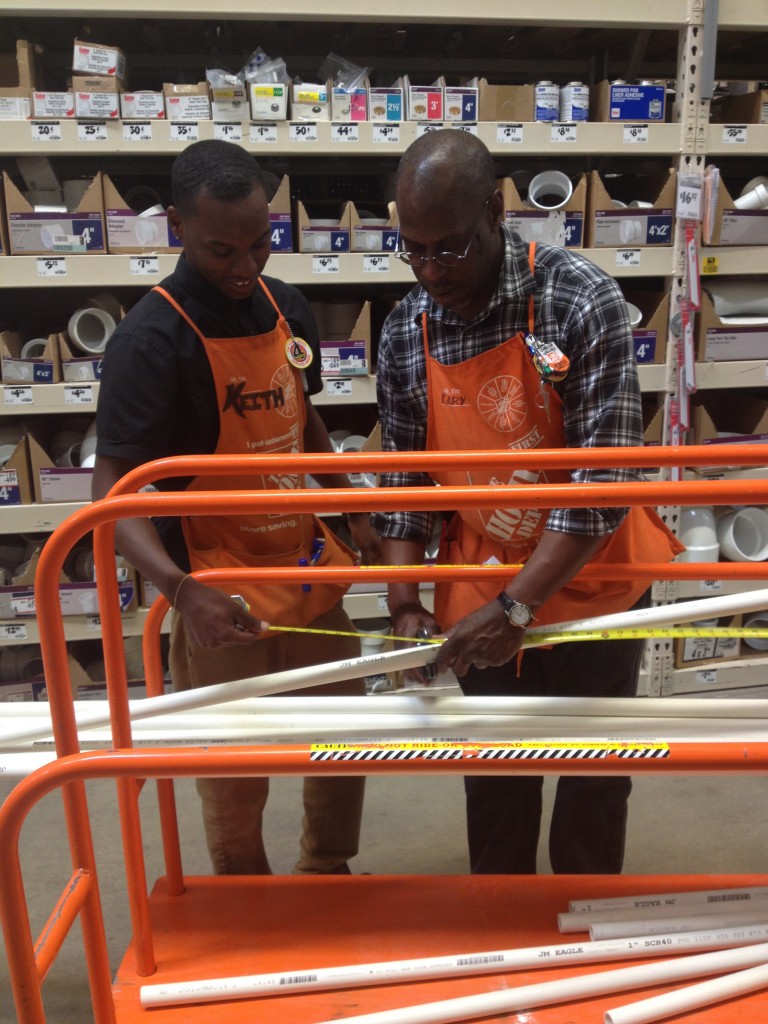
Thanks to Gary & Keith at the Home Depot in the Vinings area, I didn’t even have to cut my pieces of PVC pipe.
They even helped me construct it right there in the store!
I can’t guarantee you’ll have two guys like Gary & Keith helping you but here are the plans for the DIY photo backdrop frame so you can construct one yourself.
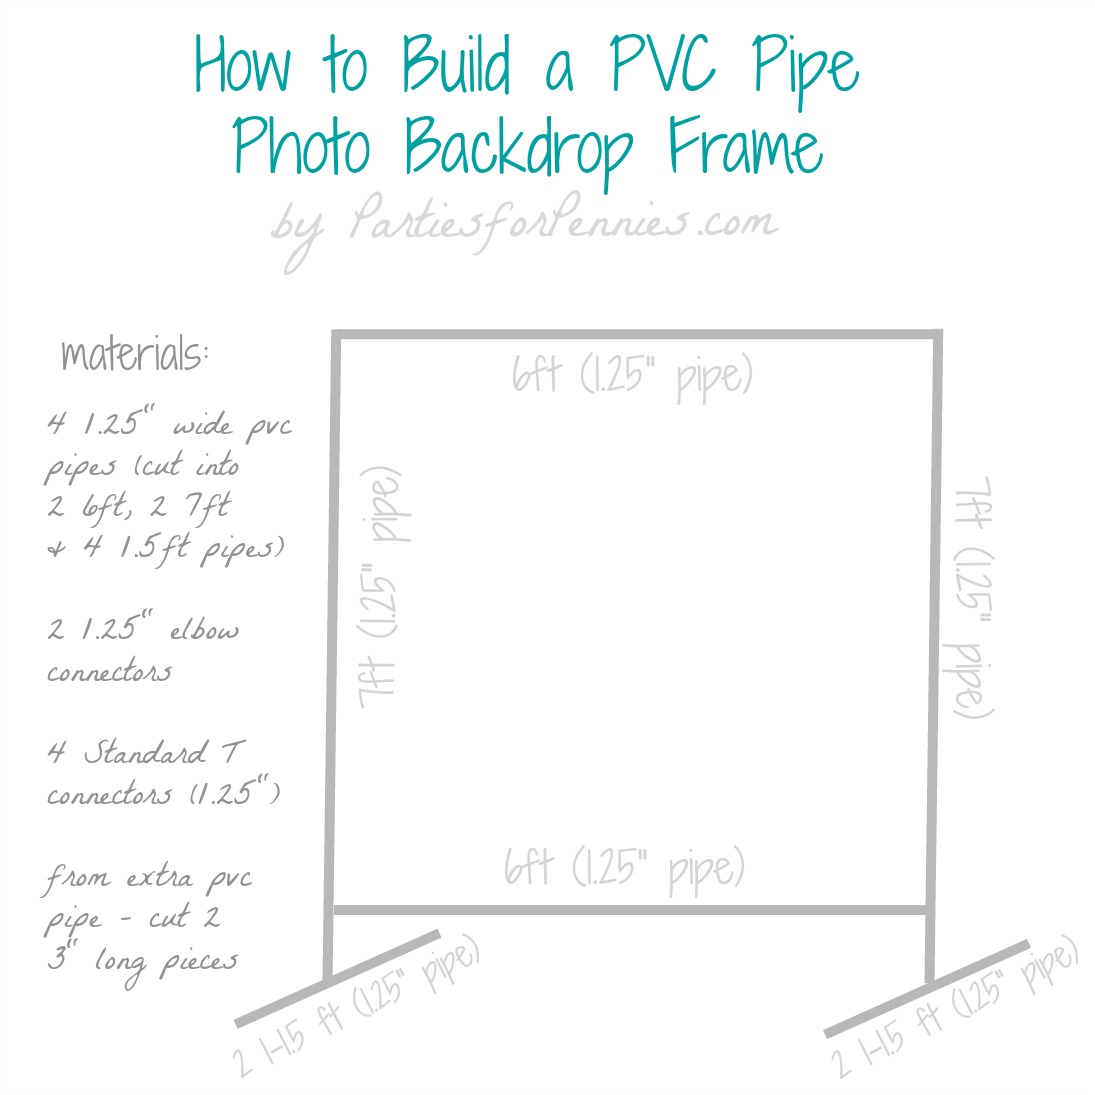
Most stores will cut the PVC pipe for you, so here are the sizes you need to tell them to cut:
2 – 6ft long 1.25″ pipes
2- 7 ft long 1.25″ pipes
4 – 1.5 ft long 1.25″ pipes
This should total 4 pipes you need to purchase. They usually come in 10ft lengths. Cut the 1.5ft long pieces from what is left from the 7ft cut. With the remaining 4ft lengths you have left from the 6ft cuts, cut two 3″ pieces.
To put together –
Use the two elbow connections to attach one 6 ft piece to the two 7ft pieces.
Add a “T” connection to the bottom of each 7ft piece, with the middle part facing in towards the rest of the backdrop.
Insert the two 3″ pipes in the bottom of the “T” connections.
This will connect to the 2nd set of “T” connections.
Attach the other two “T” connectors to the 3″ piece that’s sticking out (try & get it to stick out about 1.5″). Attach them to where the long portion is parallel to the floor.
Stick one 1.5ft piece of pipe in either end of the “T” connector.
Add a 6ft piece to the bottom of the backdrop. You can connect it by using the first “T” connector you attached.
At this point, your backdrop should resemble the picture above. You can add some caps on the end of the two “legs,” if you’d like.
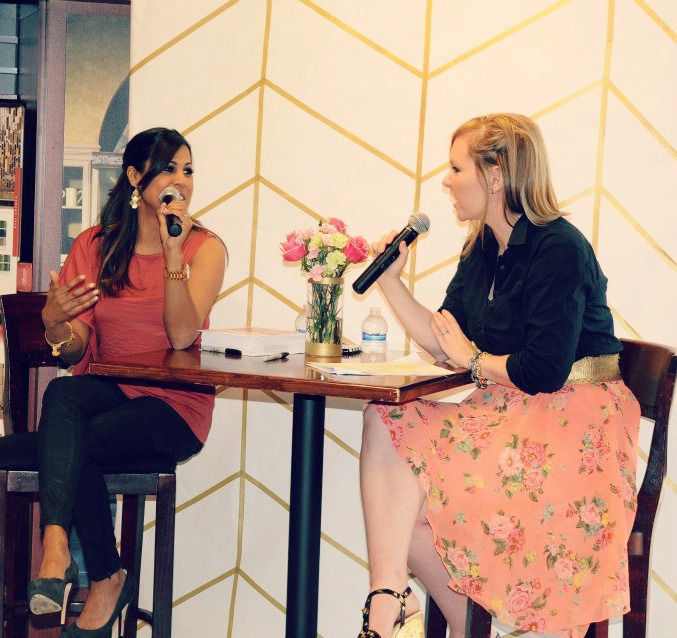
Now, add your backdrop like the one in the picture above.
This backdrop was created with just white drawing paper & gold washi tape.
For some more ideas for backdrops, check out the Parties for Pennies pinterest page.

p.s. This is YOUR official invite to the party… join in on the Parties for Pennies Facebook page, Twitter, and Pinterest!


I love this idea! I am going to make this for my daughter’s birthday party. I wanted to cover it in white oil cloth and then decorate over that. Any idea how many yards of oil cloth I will need?
Oh wonderful, Janice! You’ll have to let me know how it turns out. You’ll need at least 5 square yards to cover the backdrop. I may get 6, just to be safe. Let me know if I can do anything else! <3 Heidi
Thank you, Heidi! Have an awesome day!!!
I was wondering if i were to use a flat queen sheet will it be enough to cover the entire length? or how many yards will i need? Also how do you attach the fabric to the frame? I’m in the process of creating one for my craft show in November. Please let me know as soon as you can. Thanks for your help and for sharing your tutorial.
Hey Nancy! If you need the backdrop to fit the queen sheet, just adjust the height and wdith of the pipes. It definitely would fit a king sheet, but the queen may be a little tight. My math could be off, but it seems like 5 yards would be enough to cover the backdrop size I give in this post. I’ve attached fabric to the backdrop with packing tape before, velcro, and sewed the top like a curtain. Either of those worked. The tape may not work for a heavier fabric. Hope it works out! Feel free to email me if you have any other questions: heidi@partiesforpennies.com. <3 Heidi
Hi do you know about how much this cost you all together?
Hey Jessica! That was awhile ago, so my estimate may be a little off. I know it was under $20 to create 2 backdrops. I want to say it was around $7 each. PVC pipe is pretty inexpensive. Hope this helps! If you have any other questions, feel free to comment here or email me: heidi@partiesforpennies.com <3 Heidi
Hello,
I am ordering a step and repeat to use with this DIY PVC frame, what size step and repeat backdrop should I order and what should I use to attach/hang the step and repeat backdrop to the frame?
Thanks!
Artashia, I’d order at least a 6.5 ft. wide and 7.5 ft tall step and repeat. If it’s not that heavy, clear packing tape would do. If it’s heavy, I’d get some clamps from the hardware store. That’s not going to be as pretty, though. What I’d do is put together the top and sides (minus the base) of the backdrop frame. Attach the step & repeat to the top, then add the base and attach the sides. It’s seemed to work better for me that way, but I usually am doing it by myself. Hopefully you’ll have some help. Thanks for stopping by P4P! Would love to know how it works out! If you get a chance, I’d love to see a photo! <3 Heidi
Hi – im thinking of making this for my son’s 1st birthday party. Do you think i could buy a curtain and put the pipes through? As well as i came across many reviews stating that their top pipe started to cave in; is this sturdy enough to hold up ?
Hey Danielle!
In response to your questions –
1. I have used a curtain and put the pipes through it before. Every curtain is different, so just make sure the opening is large enough for the pipes to go through.
2. I had to have mine really tall, but if it’s for a kid’s birthday party, you definitely don’t have to have it that tall. Mine never caved in, but I’d recommend you decreasing the size of the pipes to make sure it’s really stable. Here’s the new dimensions I’d recommend – SIDES: 5-6ft. tall TOP & BOTTOM pipe: 5 ft wide The “feet” I’d keep the same.
Feel free to email me if you have any other questions – heidi@partiesforpennies.com
Thanks Danielle! <3 Heidi
The directions say to cut two 6ft and two 7ft PVC pipes but in your video, all four pipes are all cut at 6ft long. Should they all be the same dimensions or it should be two 6ft and two 7ft? Thank you 🙂
I’m so sorry to confuse you Jess. You can actually do either one. It depends on how wide & tall you’d like it to be. Just make sure you have 2 of each size. To make it taller, make the vertical sides 7ft and the horizontal sides 6ft. Reverse it if you want it longer and not as tall. <3 Heidi Rew
I’m thinking about trying this for my reception. I just need to know what size (length/width) curtain to buy for an 8×10 or 10×12 foot backdrop frame.
Camille…For a 10 foot height, your curtains would have to be 120″ long to reach the floor. You could hang several in a row, so just find out the width of the curtains and make sure you have enough to cover 96 inches across. I’d actually make sure you have more, because it probably won’t be taut. Just multiply the height by 12″ and the width by 12″ to find out the measurements your curtains need to be on any size backdrop. Hope your reception is awesome! <3 Heidi
Could this be done with bigger pvc pipe to make it more sturdy?
Probably Kat. I haven’t tried it personally. <3 Heidi Rew
Where can I go to get a banner made to go with this stand? I would like fabric on one stand and a photo banner on another stand for a fashion show
Hey Tray! I usually use Vistaprint for Banners because they’re budget-friendly. What I’ve done in the past is get a small banner printed via Vistaprint, but attach that to fabric. It’s a little more affordable. I buy fabric via onlinefabricstore. You can get some big rolls of fabric from there. Hope this helps! <3 Heidi Rew
I just found this and thank you for your tutorial and pictures. Was wondering if you had ever tried to make it wider? I’m looking for about 12 ft wide x 8 ft tall? Do you think it would sag in the middle at that width? Trying to make something easy for a wedding. Thank you.
Hey Karen! I did try to make it wider and it wasn’t as stable. What I’ve done in the past is create two of them and put them side by side. You could even make them 6ft wide each to create the 12 ft width you are looking for. <3 Heidi Rew